Today we are going to learn how to use free software to scan a single or multiple page document to a PDF. This is great if you have an old flatbed scanner laying around like I do.
Danielle asked me if we could scan a document to PDF recently and I forgot I had a nice “old” Epson Perfection 1650 flatbed scanner laying around (well preserved). I have been spoiled in recent times because we had a very nice enterprise level printer/scanner at the office with a 50 page document feeder on it. It would man handle a 2 page document and email it to me almost faster than I could make it back to my desk. These days, we are rollin’ with the Perfection 1650 flatbed…OG style homey.
The Search for Free Scanning to PDF Files Begins
I start with the standard Google search for “scan to pdf” and it brought up a number of different applications, all commercial, with some free offerings. Most had some kind of free PDF creation application that tied into Windows’ printing function…allowing you to select a PDF “printer” just like Adobe Acrobat does….except without the big price tag. All of the top Google results did not have a free scan to pdf application…some had trialware, but they all watermark the the image that is created so that you will buy the application…and, I am being cheap today.
NOTE: I am not going to mention any of the sites I visited that watermarked because one ticked me off so badly by saying it was a full functioning version and when I went to print it a big black stripe went across the pdf image I was looking at and prompted me to buy the full version if I wanted to print watermark free images. 🙂 I will say that CutePDF has a free version that people like and that is what I use to print out/generate PDF files in my solution…
The Free Scanner to PDF Solution: iCopy + CutePDF
I finally came across an article on scanning on About.com that listed an open source project called iCopy. I copy is being billed as a “free photocopier” and that is pretty much how I see it. All of the applications I installed to scan items, watermarked scans that were output to image files as well as those output as PDF files. iCopy outputs everything to an image file and then I use the free CutePDF creator to “print” to a PDF. Let’s look at the process…
[feature_box style=”2″ only_advanced=”There%20are%20no%20title%20options%20for%20the%20choosen%20style” alignment=”center”]
UPDATE 2/24/2012: Matteo Rossi just dropped by (see comment below) that significant improvements have been made in version 1.5 of iCopy including support for ADF or Automatic Document Feeders.
[/feature_box]
How to Use iCopy
When you first install iCopy you have the option to let the button on your scanner “notify” iCopy of the coming scan. None of the other applications that I used had this functionality (that I could see). iCopy makes it easy. Once installed, the main iCopy application is small, clean and simple.
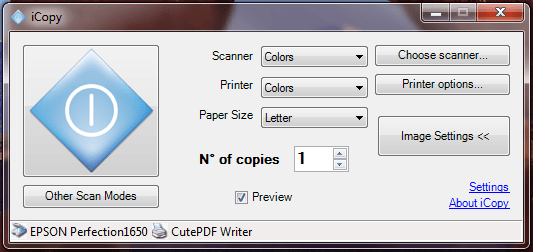
iCopy Main Screen
As you can see, there is not a lot going on and only the necessary items are in front of you. The first drop down box allows you to specify what the scanner should be looking for: Colors, Grayscale, or Text. Using colors makes for a slower scanning pass, grayscale a little faster and text much faster. Selecting the Printer drop down box, you will find two options: color or black and white. The last drop down for Paper Size allows you to select paper sizes you know and have never heard of (and probably never will again)…let’s just say they have you covered no matter what you are scanning.
Configuring iCopy
The first order of business is to configure the scanner. I was fortunate to find a Windows 7 TWAIN driver for the Epson Perfection 1650 on the Epson website and clicking the “Choose scanner…” button revealed the scanner straight away.
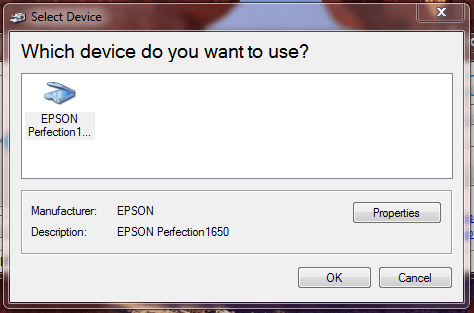
The Epson Perfection 1650 was found by iCopy right away.
Next order of business is to configure the printer options. Clicking the “Printer Options” button brings up the standard Windows printer selection window. I selected CutePDF Writer so that when I scan and print the documents, PDF files will be generated automatically. NOTE: It can take a bit for CutePDF Writer to spit out the pdf file depending on the resolution you select…be patient fast clickers. This printer is saved as the default for iCopy NOT for Windows.
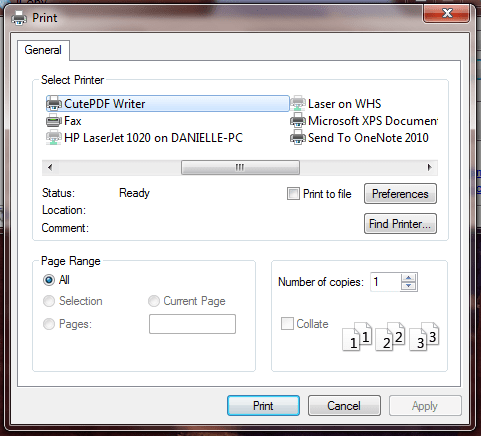
Selecting CutePDF Writer as the default printer for the iCopy application.
Last, we need to configure the image settings. You can change the Brightness, Contrast, Scaling, Resolution and the JPEG quality (as it is creating an image when scanning). I left the first 3 alone, but stepped up the resolution to 600dpi. This made for pretty nice scans that were not outrageously big. You can select resolutions from 75dpi up to 1600dpi.
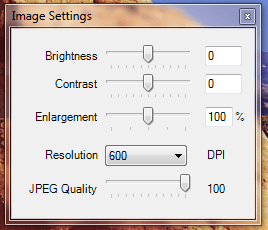
Setting the resolution to 600dpi in iCopy.
One of the nice things that iCopy does on the main screen (see first image above) is show you what scanner and what printer you have selected. Not something you normally find, but very thoughtful and useful.
Scanning and Making a Multi-Page PDF
Now that we have everything setup, it is time to make a PDF file. A single page scan is easy enough to accopmlish, you click the big blue button on the main screen and iCopy starts the scan. Alternately, if your scanner has a scan button on front that iCopy can recognize, push that bad boy and away you go. But, if you are scanning a document, chances are there are more than one page. In this case you need to click the “Other Scan Modes” button found directly below the “big blue button.” This brings up a window offering you two choices: Scan Multiple Pages (Ctrl + M) or Scan to a File. Option #1 is what we are looking for to create a multi-page file, Option #2 allows you to create an image file for a single page scan rather than outputting to a printer. Selecting “Scan Multiple Pages” activates the scan process, so you will need to have your document in the scanner before selecting this. Once the first page is done, you will have the below in front of you:
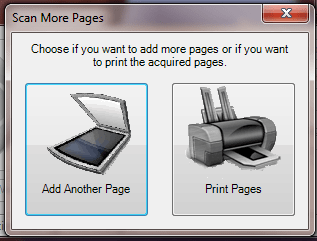
Add more pages or print the ones you have scanned.
If you have more pages to add to the file, click “Add Another Page,” otherwise, click the “Print Pages” button to output to a PDF using CutePDF Writer (or your PDF creation application of choice).
Final Thoughts
Overall, this is a very workable and simple system to use if you are too cheap and too lazy to get a document scanner. The PDFs I created using this combination were quite nice and worked well for our needs.

